Getting multiple environments setup in flutter has always been a bit if a mystery to me, I've setup multi environment setups in React Native before but somehow things seemed a bit more complex when it came to flutter. I eventually set aside a day to get it working and after following a bunch of tutorials I finally got it working.
Before I get to the setup steps its probably a good idea to know a bit about the use case for this:
1. Its a flutter app that will be published for Apple and Android.
2. I'm using Supabase for the authentication, database and file storage in the app
3. I'm using Firebase for various things such as analytics, performance monitoring, push notifications, in app messaging, remote config, in app notifications and ML. I will be using 2 different projects, one for production and one for Staging/Dev
4. I'm using Sentry for loggin errors and crashes
5. I'm using Fastlane to speed up the deploy process to IOS
6. My app will have 3 environments, Dev, Staging, Prod; Dev will point to a local supabase instalation for development, while staging and prod will each point to supabase cloud projects.
7. I will be sending my app out for testing using testflight on ios and send out apk builds for android, I need to be able to have both apps installed at the same time so i will have separate apps created on xcode and each environment of the app will have a different name and id.
Now there are alreay loads of tutorials that are really good for getting things setup in Android so will be skipping those parts, but the steps i took to get this entire setup working for ios is as follows:
First of all we need to create some directories in our ios project that will house environment specifig files, GoogleServices-Info.plist in our case:
ios/config
/dev
/prod
/stagingAt this point we want to add in the firebase_core library along with any of the other flutter plugins that we intend on using in the app, when they've all been added and configured as the docs mention we need to run the flutterfire config command, run the following command (Dont forget to replace the values to match your project)
flutterfire config \
 --project=YOUR_FIREBASE_PROJECT \
 --out=lib/firebase_options.dart \
 --ios-bundle-id=YOUR_IOS_BUNDLE_ID \
 --android-package-name=YOUR_ANDROID_PACKAGE_NAME
this will run you through the steps to and get your firebase accounts setup, when this file completes you will need to move the GoogleServices-Info.plist and the firebase_app_id_file.json files that got created into the config directory you setup in the previous step so /ios/config/prod/GoogleServices-Info.plist and /ios/config/prod/firebase_app_id_file.json
You will need to repeat this step for your staging and development environments you can use the same firebase project if you want, as long as the bundle ids are different it will just create new apps within the project, an example for dev would look like this. (Make sure to change the out= flag to be different from the one in your prod)
flutterfire config \
 --project=YOUR_DEV_FIREBASE_PROJECT \
 --out=lib/firebase_options_dev.dart \
 --ios-bundle-id=YOUR_IOS_BUNDLE_ID.dev \
 --android-package-name=YOUR_IOS_BUNDLE_ID.dev
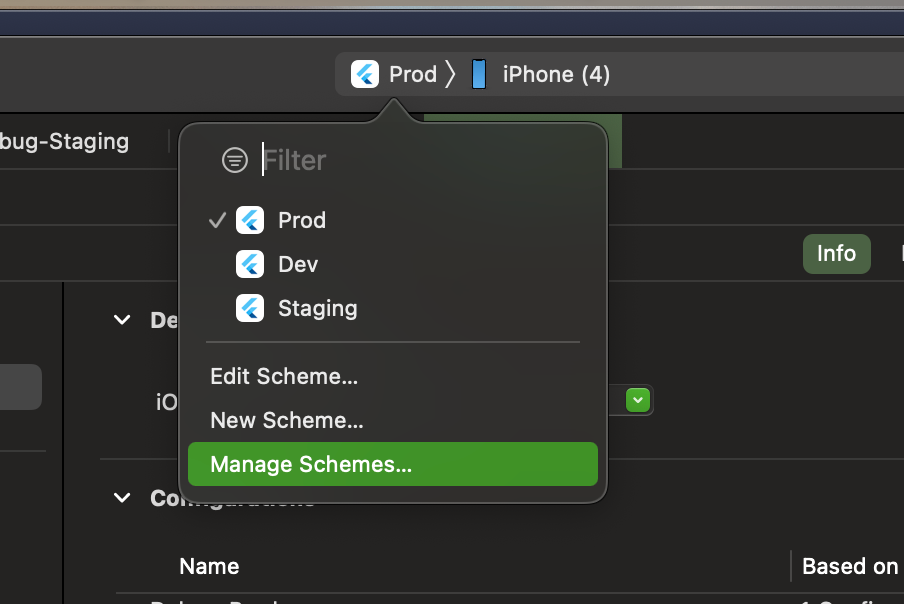
This is the part that gets a awkward to explain but I will try my best, you will want to click on the scheme in the top panel of xcode and click on manage schemes,
you will want to open xcode and click on Runner in the left sidebar, and open the Runner project
Click on the plus button and in the dropdown choose Runner for the target, and give your scheme a name, as i have done in the photo above. You only need to do this for new environments, you can simply rename the existing runner scheme to Prod which is what i have done.
Once you have created your schemes you will to create config files for each and assign them in your project info. To do this you need to duplicate the Debug and Release config files for each environment, select the default Debug config and then file -> duplicate
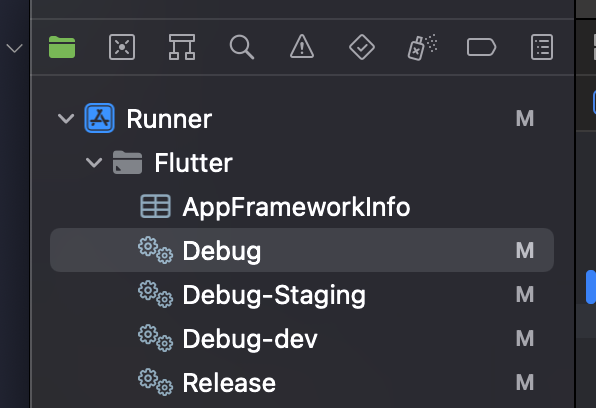
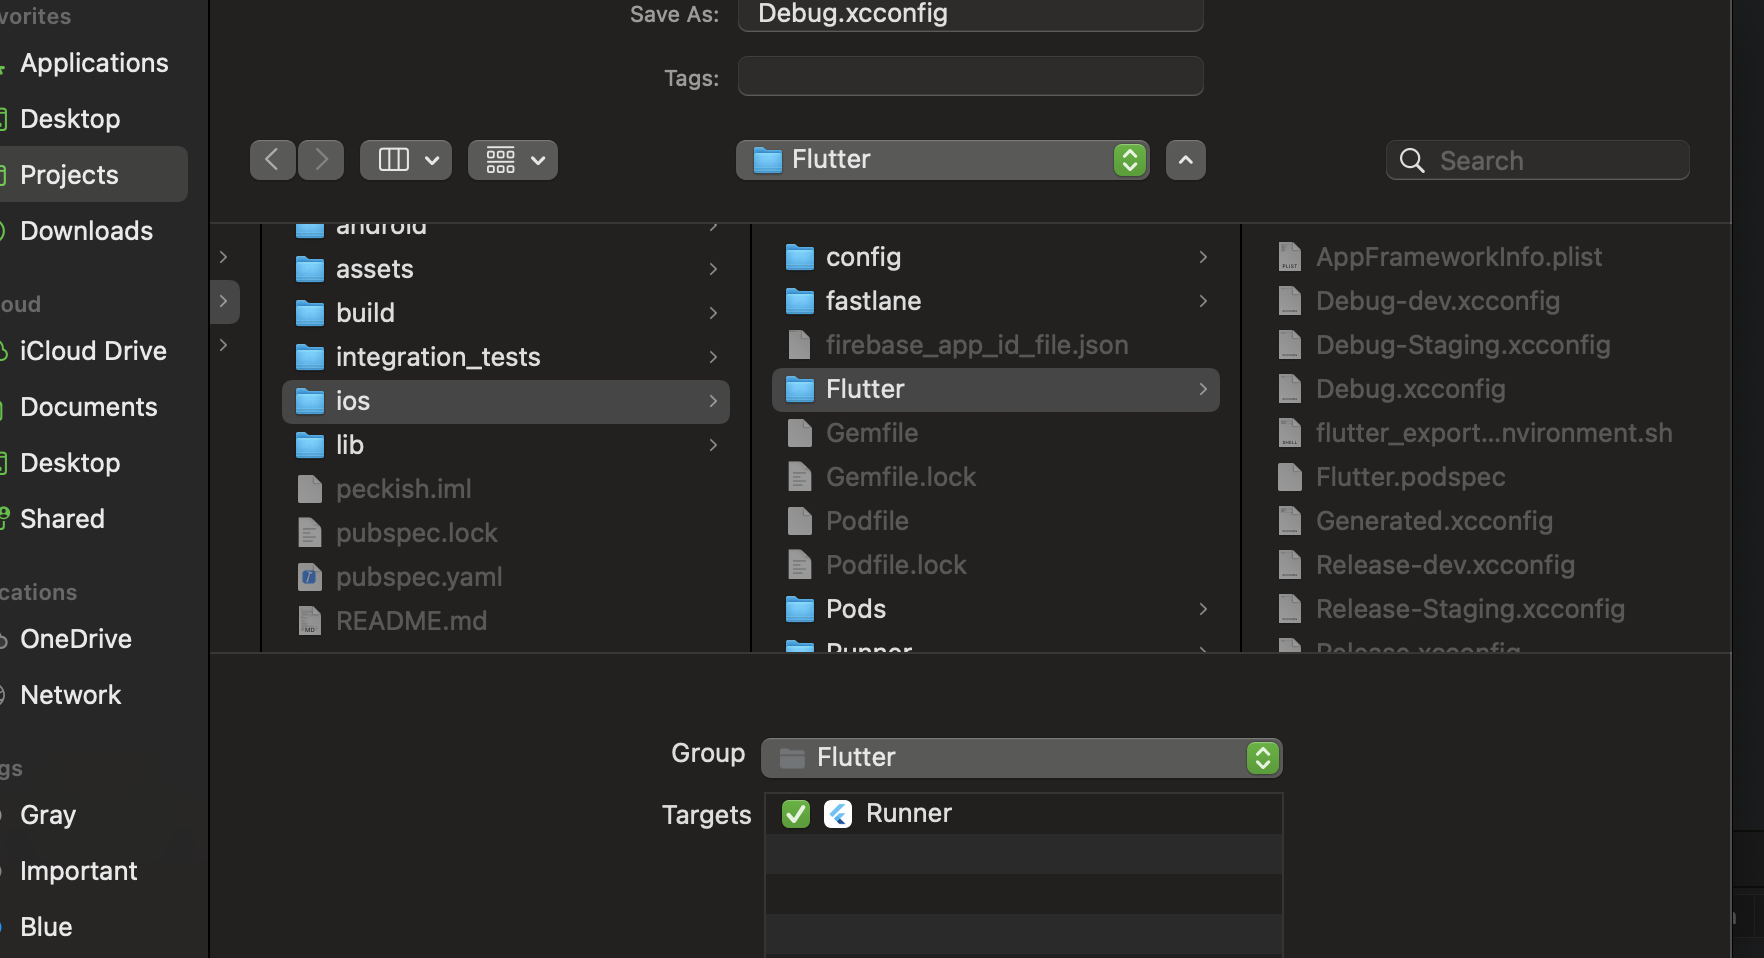
Give each one a name as above while leaving the defaults as Debug and Release, these will be used for your prod environment. You must make sure to save the file under the ios/Flutter directory and have the Runner target checked before saving as follows.
once created you want to add the following values into each of your environment configs you just created.
app_display_name=Product Name
app_env_name=Prod
app_display_name=Product Name Dev
app_env_name=Dev
app_display_name=Product Name Staging
app_env_name=Staging
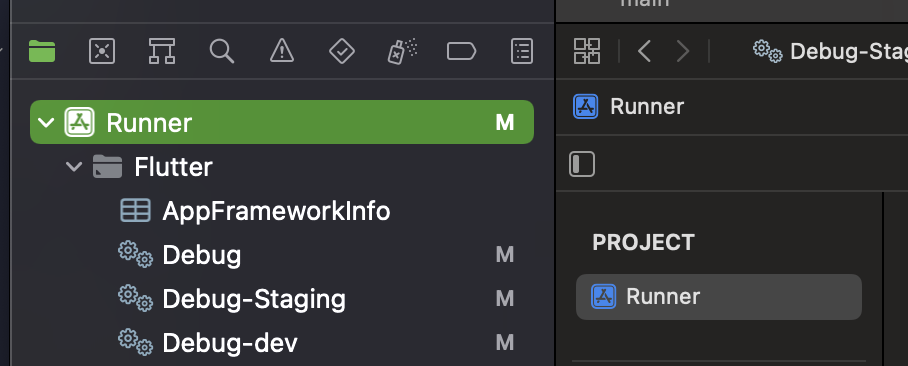
The next step is to assign these configs to our schemes, we can do that in the info section for our runner project.
You will need to add the configurations for each of our environments and rename the default ones to our prod scheme name, by the end of it your configurations should look like this
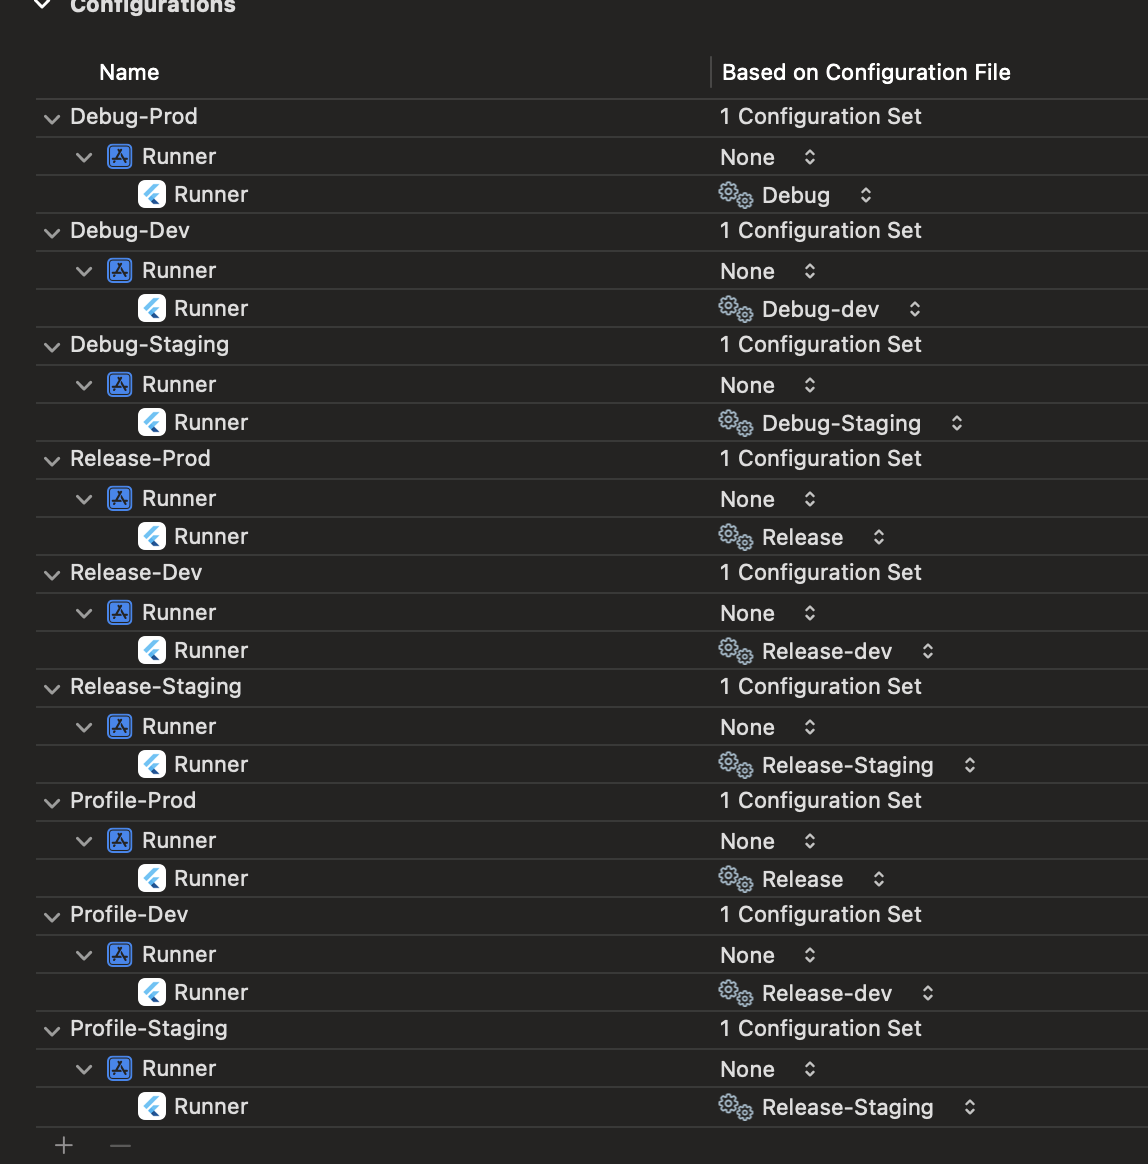
At this point you should be able able to run your app using the different environments using either excode or the flutter run --flavor YOUR_SCHEME_NAME but we arent complete yet, we still need to tell the app to use the correct firebase config for each environment, to do that we will need to add a build phase in under like below, see 'Copy firebase config file to correct location'
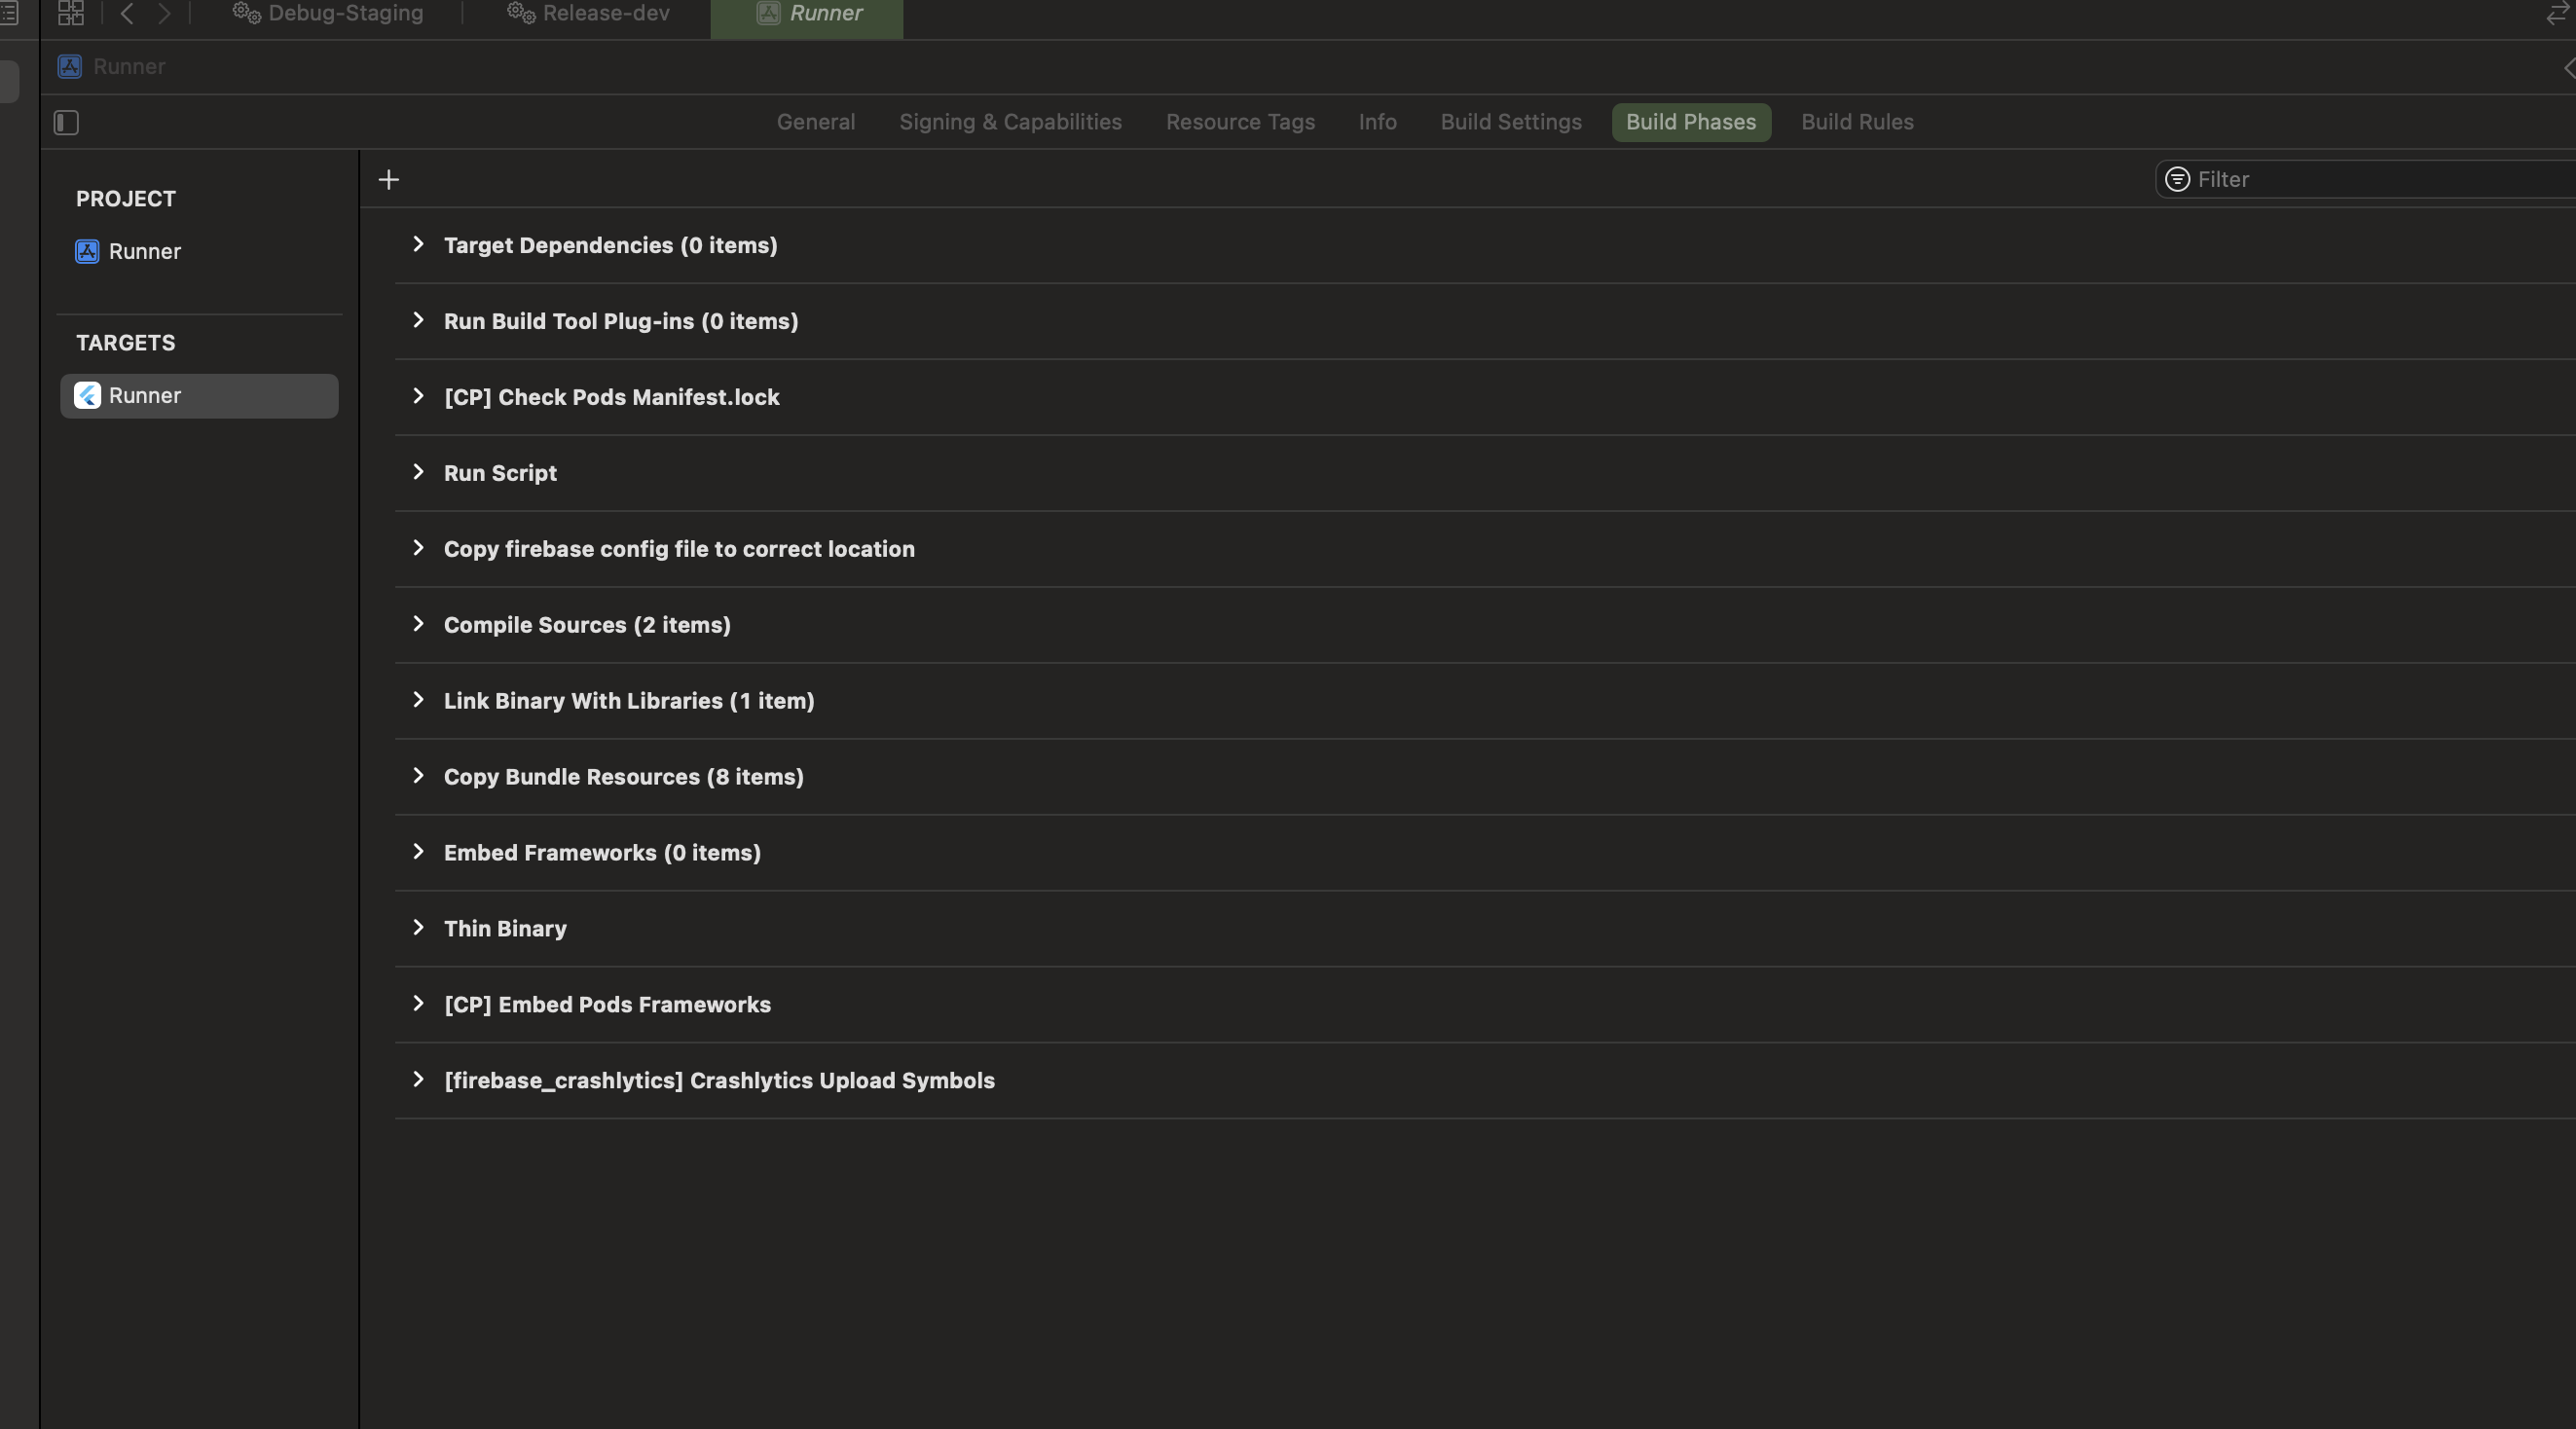
To add a build phase click the plus button in the top left and choose New Run Script Phase, and in the command section we want to paste in the following:
DESTINATION=${BUILT_PRODUCTS_DIR}/${PRODUCT_NAME}.app

if [ "${CONFIGURATION}" == "Debug-Prod" ] || [ "${CONFIGURATION}" == "Release-Prod" ] || [ "${CONFIGURATION}" == "Profile-Prod" ] || [ "${CONFIGURATION}" == "Release" ]; then
cp "${PROJECT_DIR}/config/prod/GoogleService-Info.plist" "${DESTINATION}/GoogleService-Info.plist"
echo "Production plist copied"
elif [ "${CONFIGURATION}" == "Debug-Staging" ] || [ "${CONFIGURATION}" == "Release-Staging" ] || [ "${CONFIGURATION}" == "Profile-Staging" ] || [ "${CONFIGURATION}" == "Debug" ]; then
cp "${PROJECT_DIR}/config/staging/GoogleService-Info.plist" "${DESTINATION}/GoogleService-Info.plist"
echo "Staging plist copied"
elif [ "${CONFIGURATION}" == "Debug-Dev" ] || [ "${CONFIGURATION}" == "Release-Dev" ] || [ "${CONFIGURATION}" == "Profile-Dev" ] || [ "${CONFIGURATION}" == "Debug" ]; then
cp "${PROJECT_DIR}/config/dev/GoogleService-Info.plist" "${DESTINATION}/GoogleService-Info.plist"
echo "Development plist copied"
fi
This will grab the correct GoogleService-Info.plist file and copy it in to the build file each time we run a build. Make sure to adjust if you have used different names for your environments.
Setup flavor configs
Next thing i needed to do was setup a way that I could reference different environment values based on the current flavor, I found this from another tutorial but closed the tab and can't seem to find it again.
Firstly we need to add a function into our Runner/AppDelegate.swift file, the file should look like this in the end:
import UIKit
import Flutter

@UIApplicationMain
@objc class AppDelegate: FlutterAppDelegate {
  override func application(
    _ application: UIApplication,
    didFinishLaunchingWithOptions launchOptions: [UIApplication.LaunchOptionsKey: Any]?
  ) -> Bool {
    GeneratedPluginRegistrant.register(with: self)


    let controller = window.rootViewController as! FlutterViewController

    let flavorChannel = FlutterMethodChannel(
        name: "flavor",
        binaryMessenger: controller.binaryMessenger)

    flavorChannel.setMethodCallHandler({(call: FlutterMethodCall, result: @escaping FlutterResult) -> Void in
        // Note: this method is invoked on the UI thread
        let flavor = Bundle.main.infoDictionary?["App - Flavor"]
        result(flavor)
    })


    return super.application(application, didFinishLaunchingWithOptions: launchOptions)
  }
}
Update your apps Info.plist so it allows us to access the "App - Flavor" value:
<key>App - Flavor</key>
<string>$(app_env_name)</string>
Then we can finally get into some flutter code, firstly i created a config class called FlavorSettings with the following (take not of how i am pointing to the different firebase configs) :
import 'package:firebase_core/firebase_core.dart';
import 'package:peckish/firebase_options.dart' as firebase_prod;
import 'package:peckish/firebase_options_staging.dart' as firebase_staging;
import 'package:peckish/firebase_options_dev.dart' as firebase_dev;

class FlavorSettings {
  final bool debugEnabled;
  final String supabaseUrl;
  final String supabaseAnonKey;
  final FirebaseOptions firebaseOptions;

  FlavorSettings.dev()
      : debugEnabled = true,
        supabaseUrl = '',
        supabaseAnonKey = '',
        firebaseOptions = firebase_dev.DefaultFirebaseOptions.currentPlatform;

  FlavorSettings.staging()
      : debugEnabled = true,
        supabaseUrl = '',
        supabaseAnonKey = '',
        firebaseOptions = firebase_staging.DefaultFirebaseOptions.currentPlatform;

  FlavorSettings.prod()
      : debugEnabled = false,
        supabaseUrl = '',
        supabaseAnonKey = '',
        firebaseOptions = firebase_prod.DefaultFirebaseOptions.currentPlatform;
}
To get the correct flavor we need to create a function and call it in our main.dart file like so
Future<FlavorSettings> _getFlavorSettings() async {
  String? flavor =
      await const MethodChannel('flavor').invokeMethod<String?>('getFlavor');

  if (flavor == 'Dev') {
    return FlavorSettings.dev();
  } else if (flavor == 'Prod') {
    return FlavorSettings.prod();
  } else if (flavor == 'Staging') {
    return FlavorSettings.staging();
  } else {
    throw Exception("Unknown flavor: $flavor");
  }
}

final settings = await _getFlavorSettings();

// settings.supabaseUrl
// settings.firebaseOptions
// etcThe next thing i wanted to do was make sure that i could still use fastlane to help deploy ios apps to xcode that will work with each environment, to do this i used the fastlane init setup and followed the steps to setup for deploying to TestFlight, we then need to update the Fastfile and Appfile that fastlane created to be the following:
// Fastfile
default_platform(:ios)
platform :ios do
desc "Push a new beta build to TestFlight"
lane :beta do
build_app(workspace: "Runner.xcworkspace", scheme: "Prod")
upload_to_testflight
end
lane :beta_dev do
build_app(workspace: "Runner.xcworkspace", scheme: "Dev")
upload_to_testflight
end
lane :beta_staging do
build_app(workspace: "Runner.xcworkspace", scheme: "Staging")
upload_to_testflight
end
end
// AppFile

app_identifier("APP_IDENTIFIER") # The bundle identifier of your app
apple_id("APPLE_ID") # Your Apple Developer Portal username

itc_team_id("ASC_TEAM_ID") # App Store Connect Team ID
team_id("DEV_ACCOUNT_TEAM_ID") # Developer Portal Team ID

# For more information about the Appfile, see:
#     https://docs.fastlane.tools/advanced/#appfile


for_platform :ios do
  for_lane :beta_dev do
      app_identifier 'APP_IDENTIFIER.dev'
  end
  for_lane :beta_staging do
      app_identifier 'APP_IDENTIFIER.staging'
  end
endYou can now create your apps in App Store Connect using the ids that you setup, when done you can deploy your app using fastlane beta , fastlane beta_dev , fastlane beta_staging
That should be all you need to get going but feel free to reach out if you think there is anything I can add.
Hopefully this tutorial has helped you get a multiple environment setup with firebase and custom config variables for your flutter app.
Thanks for reading my article Flutter (IOS) multiple environments setup with firebase and custom config variables, if you like reading my articles and tutorials feel free to share them and drop me an email with any suggestions on new topics or even for a chat to discuss your next development project.